aframe-playground
A playground for learning about A-frame
Selecting objects
Interacting with the scene means not only moving around, but also selecting objects. For that, we will use some mechanism to “select” an object in the scene, and then raising some event in the corresponding HTML element. The element will detect that event, and act accordingly. This is the way selection and actions following selection usually occur in web front-end programming, so the model will look familiar to people used to build web front-end applications.
Raising events with the mouse
When we’re in desktop, we can raise events in objects with the mouse.
For that, we need a cursor element in the scene,
as an element within the scene
(this is how we will include in the following examples):
<a-scene>
  <a-entity cursor="rayOrigin:mouse"></a-entity>
</a-scene>
The cursor is basically defining a ray, which may “touch”
some object, selecting it. Since for now we’re using it with a mouse,
we want the ray to come “from the object to where the mouse points”.
This is what rayOrigin:mouse does.
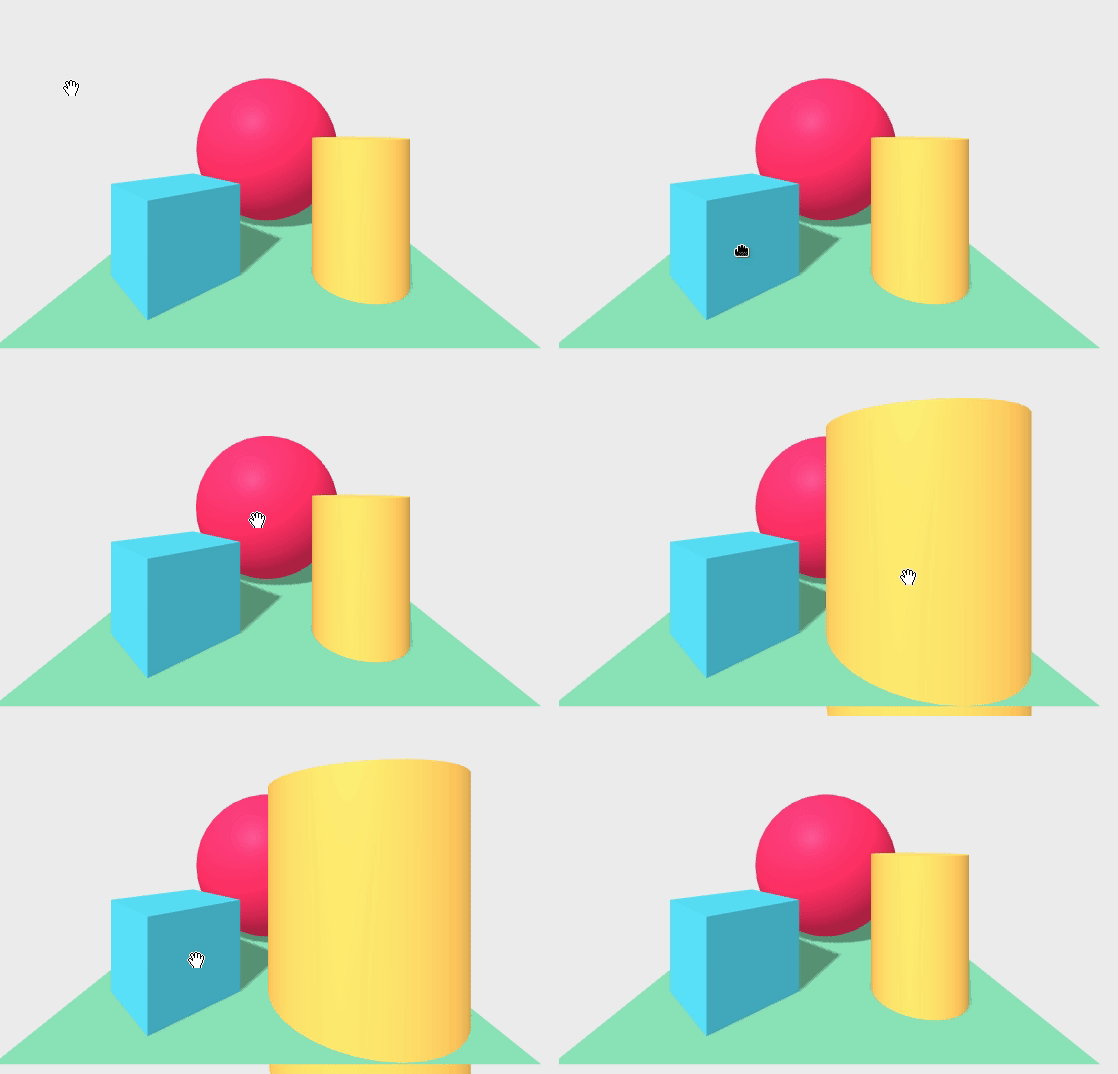
To find out that we’re actually selecting objects, and raising event in them, we need to define some handler for those events in the objects themselves. We can for example use the animation component: this will make the box “jump” when we click on it
      <a-box position="-1 0.5 -3" rotation="0 45 0" color="#4CC3D9" shadow
        animation="startEvents: click; property: position;
          from: -1 1.5 -3; to: -1 0.5 -3 dur: 1000">
      </a-box>
That is: when the “click” event is detected in this object, make it go from Y=1.5 to Y=0.5 in one second. The efect is like if the box “jumps” and then falls down.
We can also make a sphere “grow” when clicked (by acting on its scale property),
and a cylinder grow when mouse enters it, and come back to its original size
when muse leaves.
      <a-sphere position="0 1.25 -5" radius="1.25" color="#EF2D5E" shadow
        animation="startEvents: click; property: scale;
          from: 2 2 2; to: 1 1 1; dur: 1000">
      </a-sphere>
      <a-cylinder position="1 0.75 -3" radius="0.5" height="1.5" color="#FFC65D" shadow
        animation__enter="startEvents: mouseenter; property: scale;
          to: 2 2 2; dur: 1000"
        animation__leave="startEvents: mouseleave; property: scale;
          to: 1 1 1; dur: 1000">
      </a-cylinder>
Watch this scene in your browser, or check its complete source code
The final result is like this:

Supporting controls of VR devices
Support of the Oculus controls in AFrame comes via two components: oculus-go-controls for Oculus Go, and oculus-touch-controls for Rift, Rift S, Oculus Quest 1 and 2. There are components for other devices (MagicLeap, Gear, etc). They will handle events from the corresponding controls, if present (so, we can add all of them to the scene, and only those that are present will work).
We’re not going to use these controls directly, but by the intermediation of a more abstract component: laser-controls. It sits on top of the available controls, and deals with the raytracing to selecting an object:
<a-entity laser-controls="hand: right"></a-entity>
That’s all we need. The rest of the scene is exactly the same we had.
If we don’t remove from it the cursor component, it will also work
in desktop, exactly the way it worked.
It is important to notice that, in Oculus, movement won’t work,
since we have not included the movement-controls component we used when
we added that capability.
Watch the resulting scene in your browser, or check its complete source code
Adding camera movement in VR devices
As we already did when adding camera movement
for VR devices, we need a movement-controls component
(provided by the A-Frame Extras library),
to use the touchpad in the Go control.
See the previous section for learning how to include A-Frame Extras,
and then include the following elements (note that cursor and
laser-controls, that we already had are now within movement-controls):
<a-entity movement-controls="fly: true" position="0 0 0">
  <a-entity camera position="0 1.6 0" look-controls></a-entity>
  <a-entity cursor="rayOrigin:mouse"></a-entity>
  <a-entity laser-controls="hand: right"></a-entity>
</a-entity>
In this code, movement-controls adds the capabilities to move in several VR devices,
camera adds the camera with look-controls (wasd-controls is pulled in by movement-controls,
so we don’t need to include it to move with arrow or WASD keys in desktop).
Finally, cursor and laser-controls work as we described above.
Watch the resulting scene in your browser, or check its complete source code.
Now, with event handlers
We can write our own JavaScript event handlers, instead of relying on what A-Frame components provide. This is for sure much more flexible, since we will program any behavior we may want, but requires writing some JaveScript code, instead of just dealing with HTML.
In this case, we will write our own A-Frame component
that behaves as we want, when it receives click, mouseenter, or
mouseleave events. For details on how to write a component,
read Writing a component
in the AFrame documentation.
In our case, we will focus on explaining how the event handlers
are installed by the initialization module of our component,
and how they will behave when the events are fired on it.
The JavaScript code for building the new component (event-listener)
should be included before the scene (we will include it in the header of the
HTML page):
<script>
  AFRAME.registerComponent("click-listener", {
    init: function() {
      this.el.addEventListener("click", function(e) {
        console.log(e.target)
        e.target.setAttribute('scale', {x: 2, y: 2, z: 2});
        });
      this.el.addEventListener("mouseenter", function(e) {
        console.log(e.target)
        e.target.setAttribute('scale', {x: 1.5, y: 1.5, z: 1.5});
        });
      this.el.addEventListener("mouseleave", function(e) {
        console.log(e.target)
        e.target.setAttribute('scale', {x: 1, y: 1, z: 1});
        });
      }
  });
</script>
This code adds event listeners in the init function of the component.
For each of the click, mouseenter, and mouseleave events,
the event handler will log the event in console, and change
the scale attribute of the component.
For having this behavior, entities (our “bodies” in the scene) just need to include this component:
      <a-box event-listener position="-1 0.5 -3" rotation="0 45 0"
             color="#4CC3D9" shadow></a-box>
      <a-sphere event-listener position="0 1.25 -5" radius="1.25"
                color="#EF2D5E" shadow></a-sphere>
      <a-cylinder event-listener position="1 0.75 -3" radius="0.5"
                  height="1.5" color="#FFC65D" shadow></a-cylinder>
Watch the resulting scene in your browser, or check its complete source code.