A playground for learning about A-frame
| Back to the main page | Source code |
All of this is based on:
Converting terrain data to WebGL-friendly format (and some other posts linked in this one).
I’m going to create a 3D elevation map, using Copernicus elevation data (EU-DEM). For that, I download two tiles, North and South of Madrid (eu_dem_v11_E30N10.zip and eu_dem_v11_E30N20.zip). I unzip them, which produces four files per tile (with extensions TFw, TIF). All of them are in directory $demdata.
To work with these maps, and produce maps with the information I need, I install gdal. In Debian, that’s easy because it is a regular package:
sudo apt install gdal-bin
Now, I build a gdal virtual dataset with both tiles, and produce a file in ENVI format (map.bin) with the elevation data. I do that in the tmp directory, whcih I will use as a temporary storage for the intermediary maps and datasets I need:
mkdir tmp
cd tmp
gdalbuildvrt map.vrt $demdata/eu_dem_v11_E30N10.TIF $demdata/eu_dem_v11_E30N20.TIF
gdalinfo -mm map.vrt
gdalwarp -te 3000000 2000000 3100000 2100000 map.vrt map.tif
gdalinfo -mm map.tif
gdal_translate -scale 0 2522 0 255 -outsize 200 200 -of PNG map.tif ../map.png
gdal_translate -scale 0 2522 0 65535 -ot UInt16 -outsize 200 200 -of ENVI map.tif ../map.bin
Let’s explain the process in some more detail:
I start by using gdalbuildvrt to build a dataset (in this case, with two TIF files for elevation data).
Then, we get the coordinates of the generated vrt file. These coordinated mean the data for this file is between 3 Mmeters (3,000 Km) and 4 Mmeters West, and between 1 Mmeters and 3 Mmeters North:
Corner Coordinates:
Upper Left  ( 3000000.000, 3000000.000) (  8d 7'39.52"W, 48d38'23.47"N)
Lower Left  ( 3000000.000, 1000000.000) (  3d40'26.43"W, 30d56'55.67"N)
Upper Right ( 4000000.000, 3000000.000) (  5d31' 4.07"E, 50d 1'26.83"N)
Lower Right ( 4000000.000, 1000000.000) (  6d39'15.95"E, 31d56'35.96"N)
Center      ( 3500000.000, 2000000.000) (  0d18'45.65"E, 40d37'27.81"N)
Band 1 Block=128x128 Type=Float32, ColorInterp=Gray
Min=-33.271 Max=3451.047   Computed Min/Max=-33.271,3451.047
Then, I use gdalwarp to build a TIF file, test.tif, corresponding to a fraction of the dataset. In this case, the lower correspond to the lower left corner of the upper image included in the dataset. Coordinates are Xmin Ymin Xmax Ymax. Have in mind that not all coordinates have values, since the map covers only Europe (and not, for example, Africa), which means that if you select a region with no values, it will say there is no elevation data, when asking for the elevation.
Then, I check with gdalinfo the coordinates of the produced file, and find the max and min elevation:
Upper Left  ( 3000000.000, 2100000.000) (  5d41'57.17"W, 40d45'34.34"N)
Lower Left  ( 3000000.000, 2000000.000) (  5d28'46.07"W, 39d52'33.70"N)
Upper Right ( 3100000.000, 2100000.000) (  4d32' 7.72"W, 40d56'21.51"N)
Lower Right ( 3100000.000, 2000000.000) (  4d19'51.35"W, 40d 3'10.47"N)
Center      ( 3050000.000, 2050000.000) (  5d 0'39.47"W, 40d24'31.80"N)
Band 1 Block=4000x1 Type=Float32, ColorInterp=Gray
    Computed Min/Max=249.094,2521.040
The first part confirms that the coordinates in test.tif are from 3 Mmeters W to 3.1 Mmeters W, and from 2 Mmeters N to 2.1 Mmeters N.
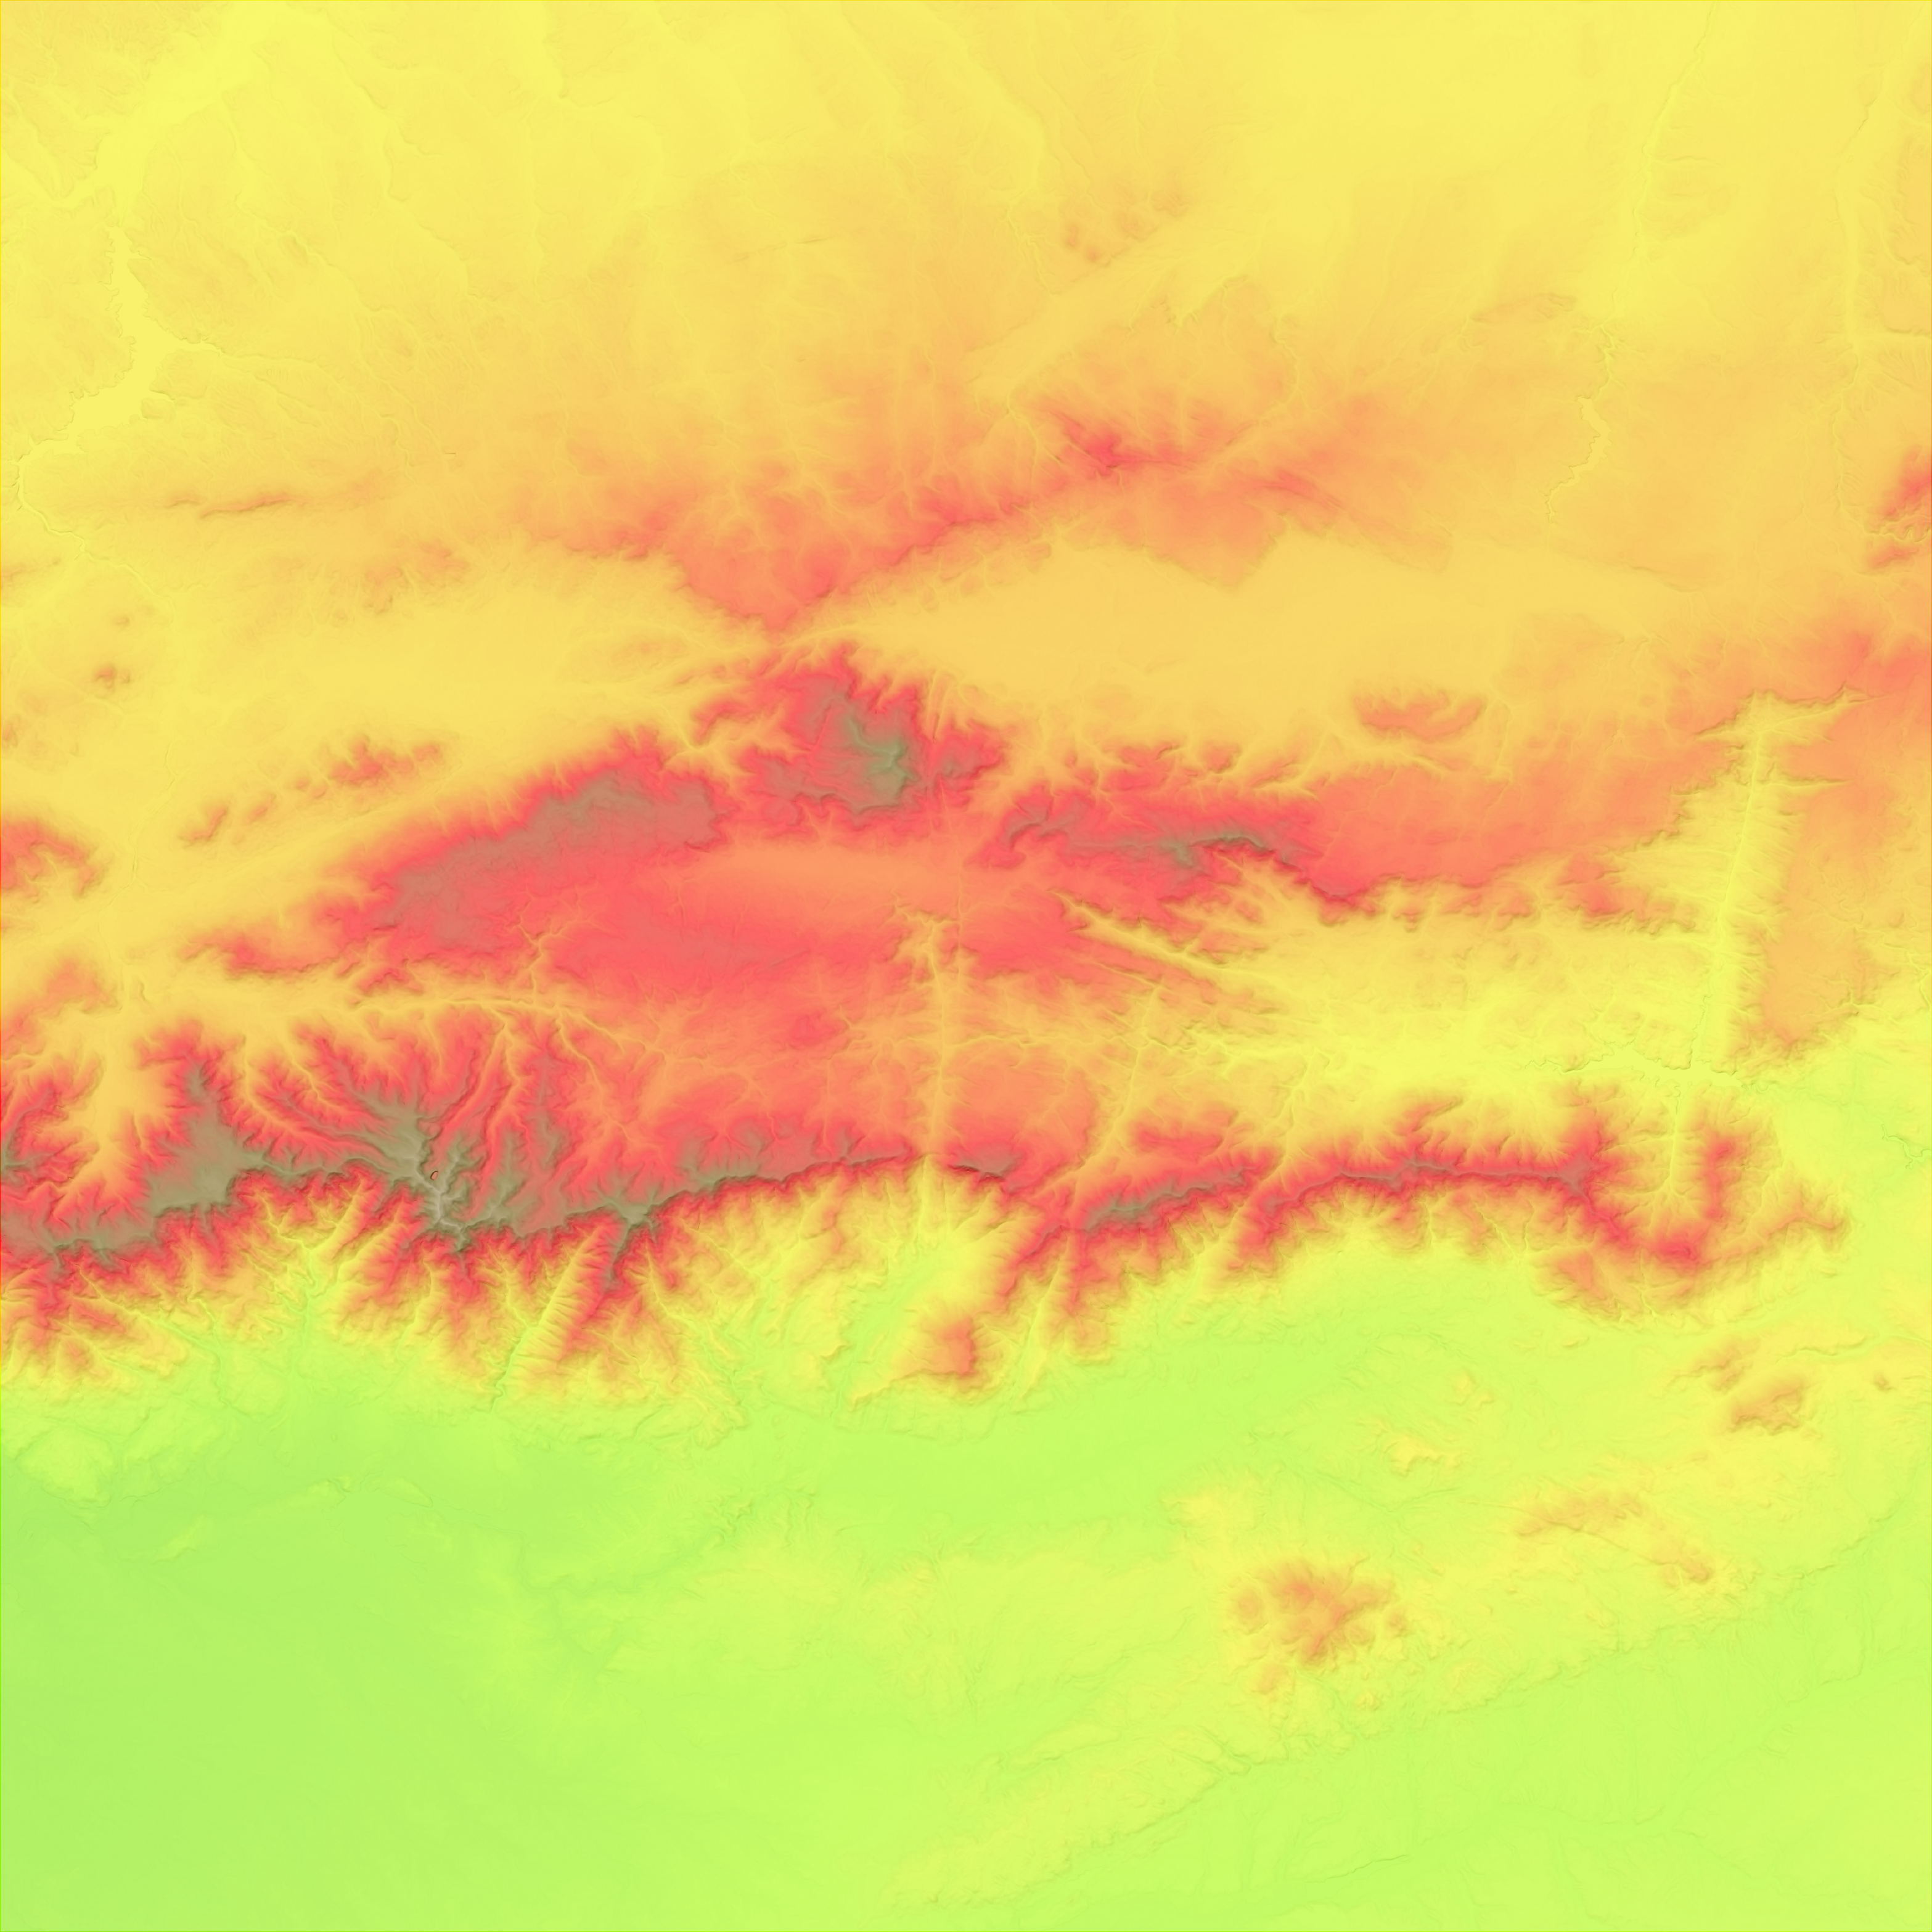
Then, we produce a PNG file (map.png), with less resolution, to make it manageable. The first two numbers (0 2522) are the real elevation range in meters, from the TIF file, to be translated to the second two numbers (0 255), range of the PNG file (256 levels). This file is mainly to check how things are going, because you can see the relief in it, but I won´t use anymore.
The second gdal_translate does the same, but producing an ENVI file (map.bin), in which long integers (16 bit) can be used, thus having much better resolution.
Now, this file can already be included in the aframe-terrain-model as follows (see documentation for A-Frame Terrain Model component for details):
<a-entity terrain-model="dem: url(map.bin);
    planeWidth: 200;
    planeHeight: 200;
    segmentsWidth: 199;
    segmentsHeight: 199;
    zPosition: 20;
    wireframe: true"
        id="terrain"></a-entity>
I can see the result by inserting this entity in an A-Frame scene, as I do in wireframe.html. Check the actual scene in your browser
To have colored texture and hillshades, so that we can have something better than plain wireframe, we follow instructions in Creating color relief and slope shading with gdaldem:
color_relief.tif), by running (in directory tmp):gdaldem color-relief map.tif ../color-relief.txt color_relief.tif
tmp):gdaldem hillshade -combined map.tif hillshade.tif
sudo apt install mapnik-utils python3-mapnik
python3 terrain.py
This produces a nice terrain.png file, which can be used a texture for the map. I load it in a copy of the previous scene (file terrain.html) by adding a new property to terrain-model: map: url(terrain.png);.Check the scene in your browser. Be patient: maybe the color map will take some seconds to load.
Finally, I remove the wireframe, include maps as assets, add mobility for when in VR, and some other minor details. Check the final scene in your browser.